Unity 簡易血條製作
分類
說明
此篇是參考一篇外國的血條製作教學,程式的部分有稍微修改一下
主要使用 Unity UI 系統來顯示血條
Player 中有 Health System 組件,Health System 有一個 Health Sliser 欄位
那個欄位是用來放 Slider 組件,Health System 就是在控制那個 Slider
更新
2022/10/26
1. 血條系統綁定在 Player 身上,避免被到處叫來叫去
2. 新增完全恢復方法
舊版 Slider 遊戲物件取名為 HealthSystem
是因為舊版的 Health System 是綁在 Slider 上
新版的 Health System Script 綁在 Player 上
新版的 Health System 多一個 Health Sliser 就是要放範例建立的 Slider
你可以將舊版 Slider 遊戲物件改名為 HealthSlider 會比較好理解
因為改名要換很多圖片,所以底下的範例名稱未更改,請見諒
===================================================
建立專案
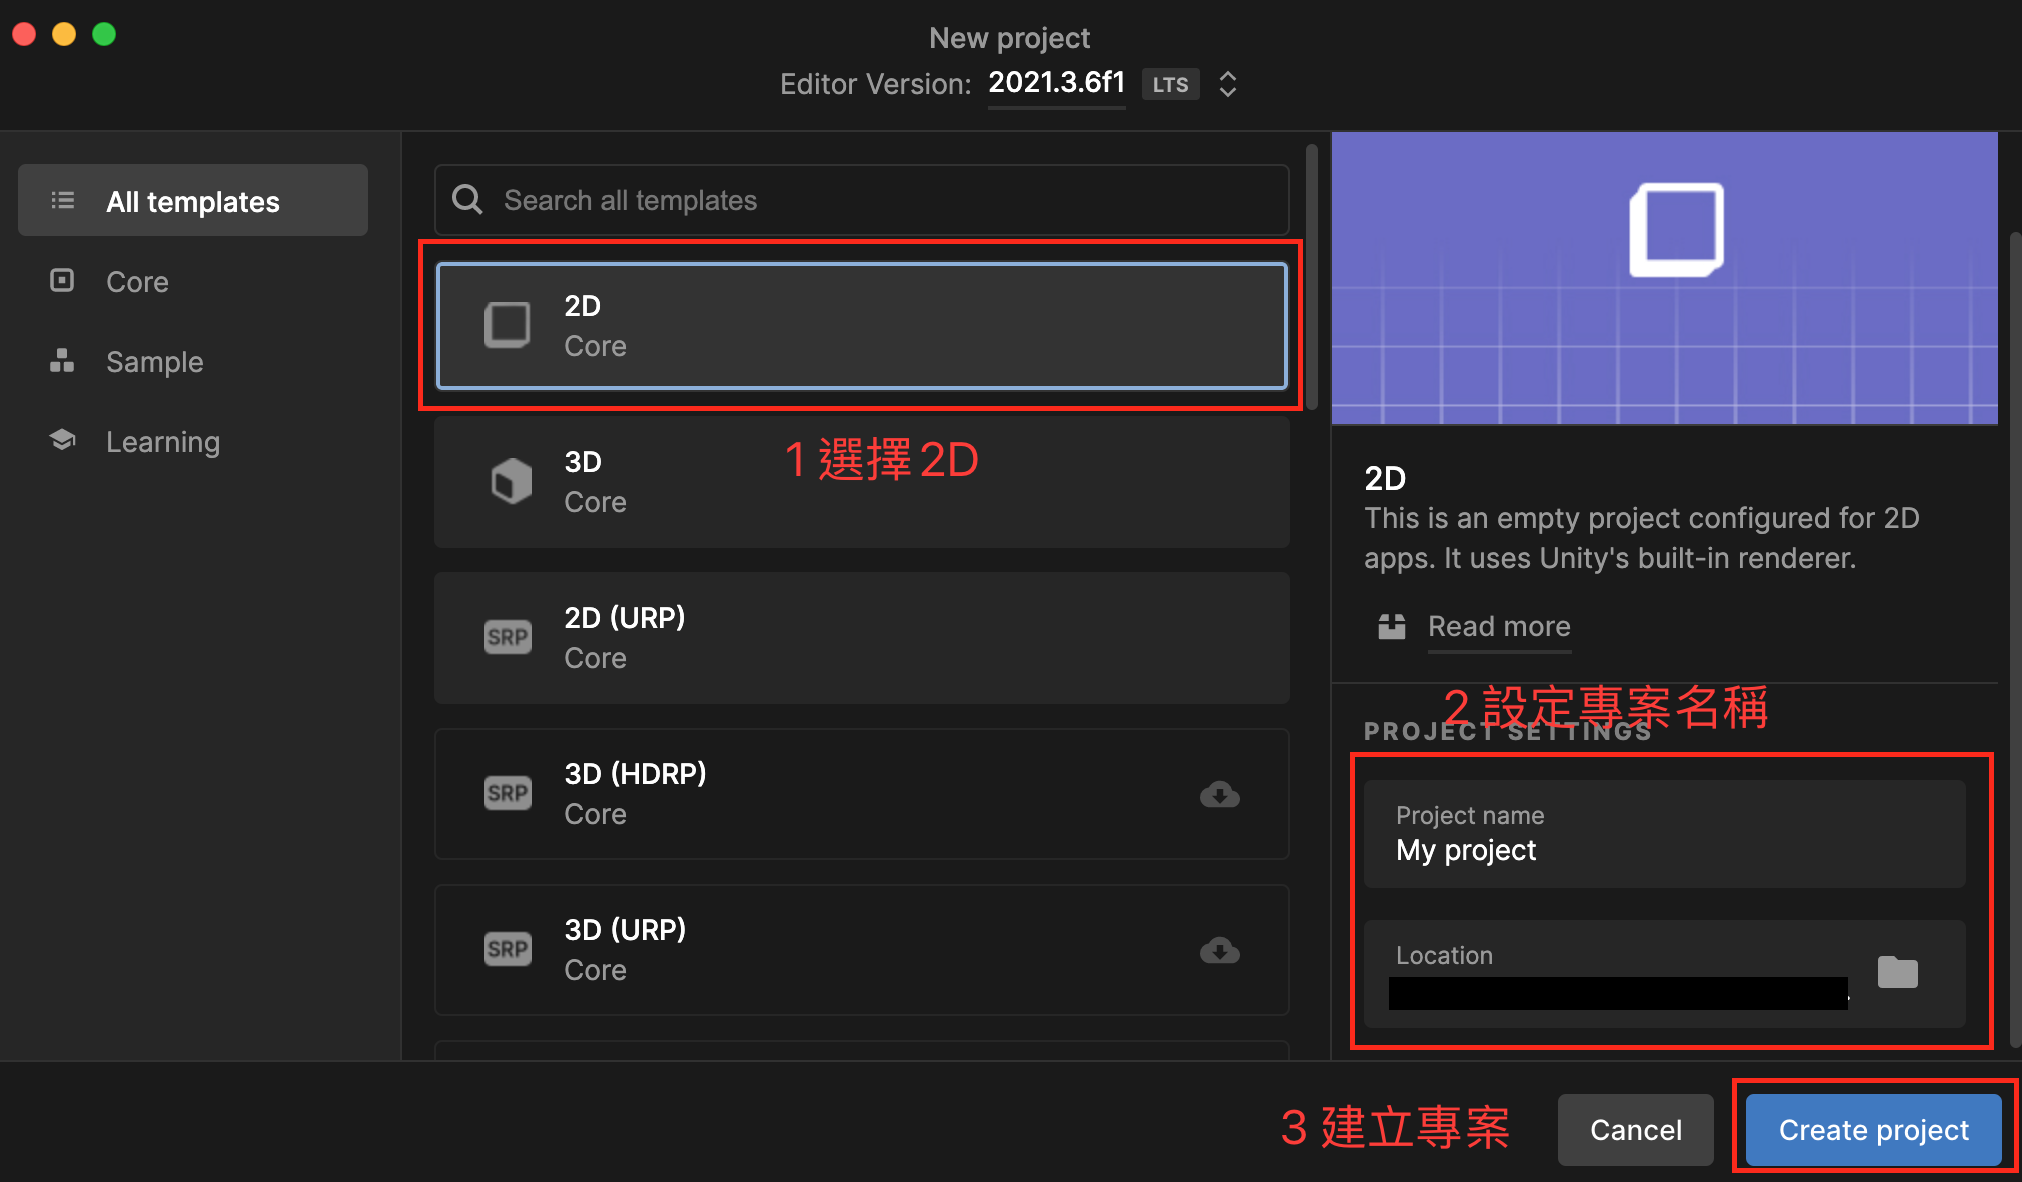
若您還沒建立專案,請先建立一個 2D 專案
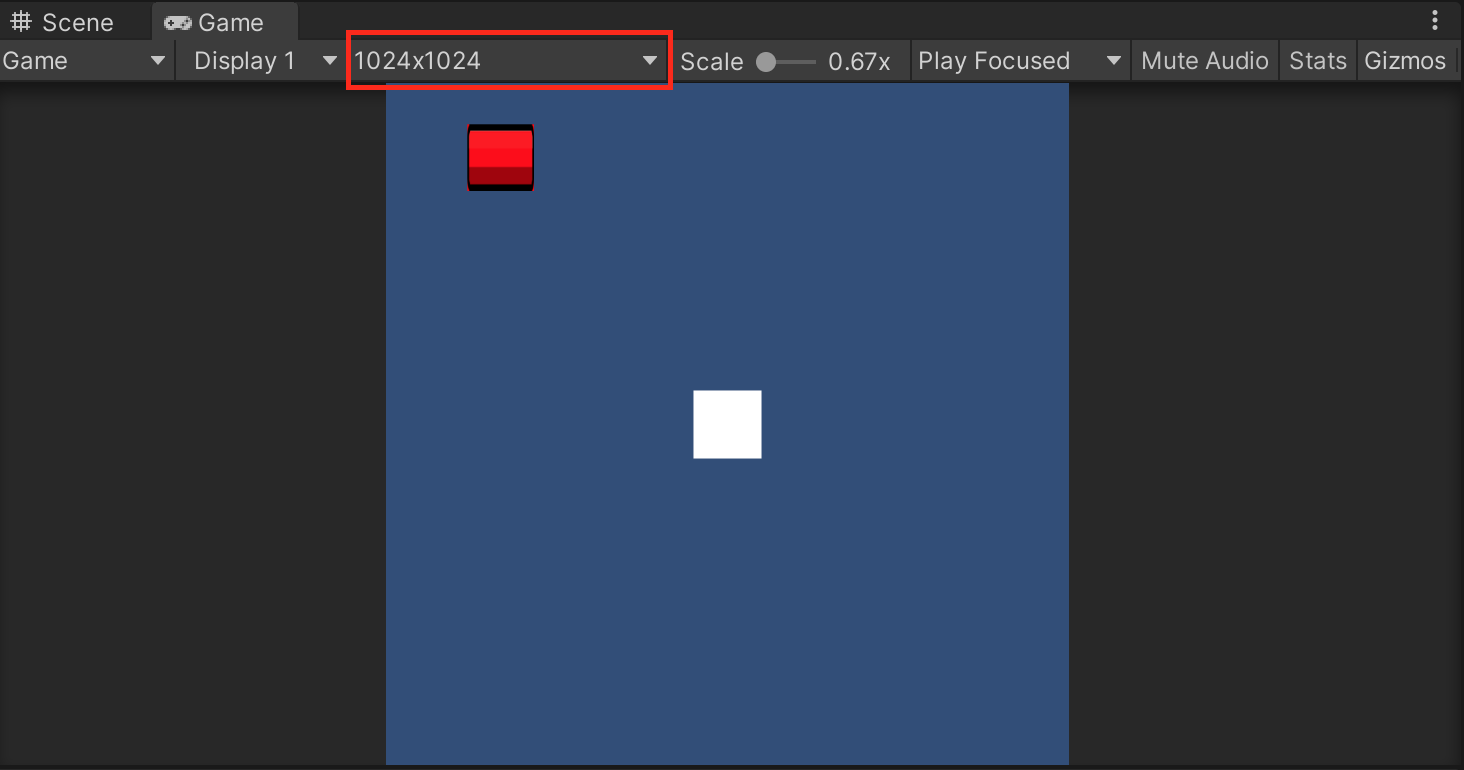
將 Game 解析度調整成 1024 x 1024,此解析度為本篇範例教學所用,讀者可以自行調整
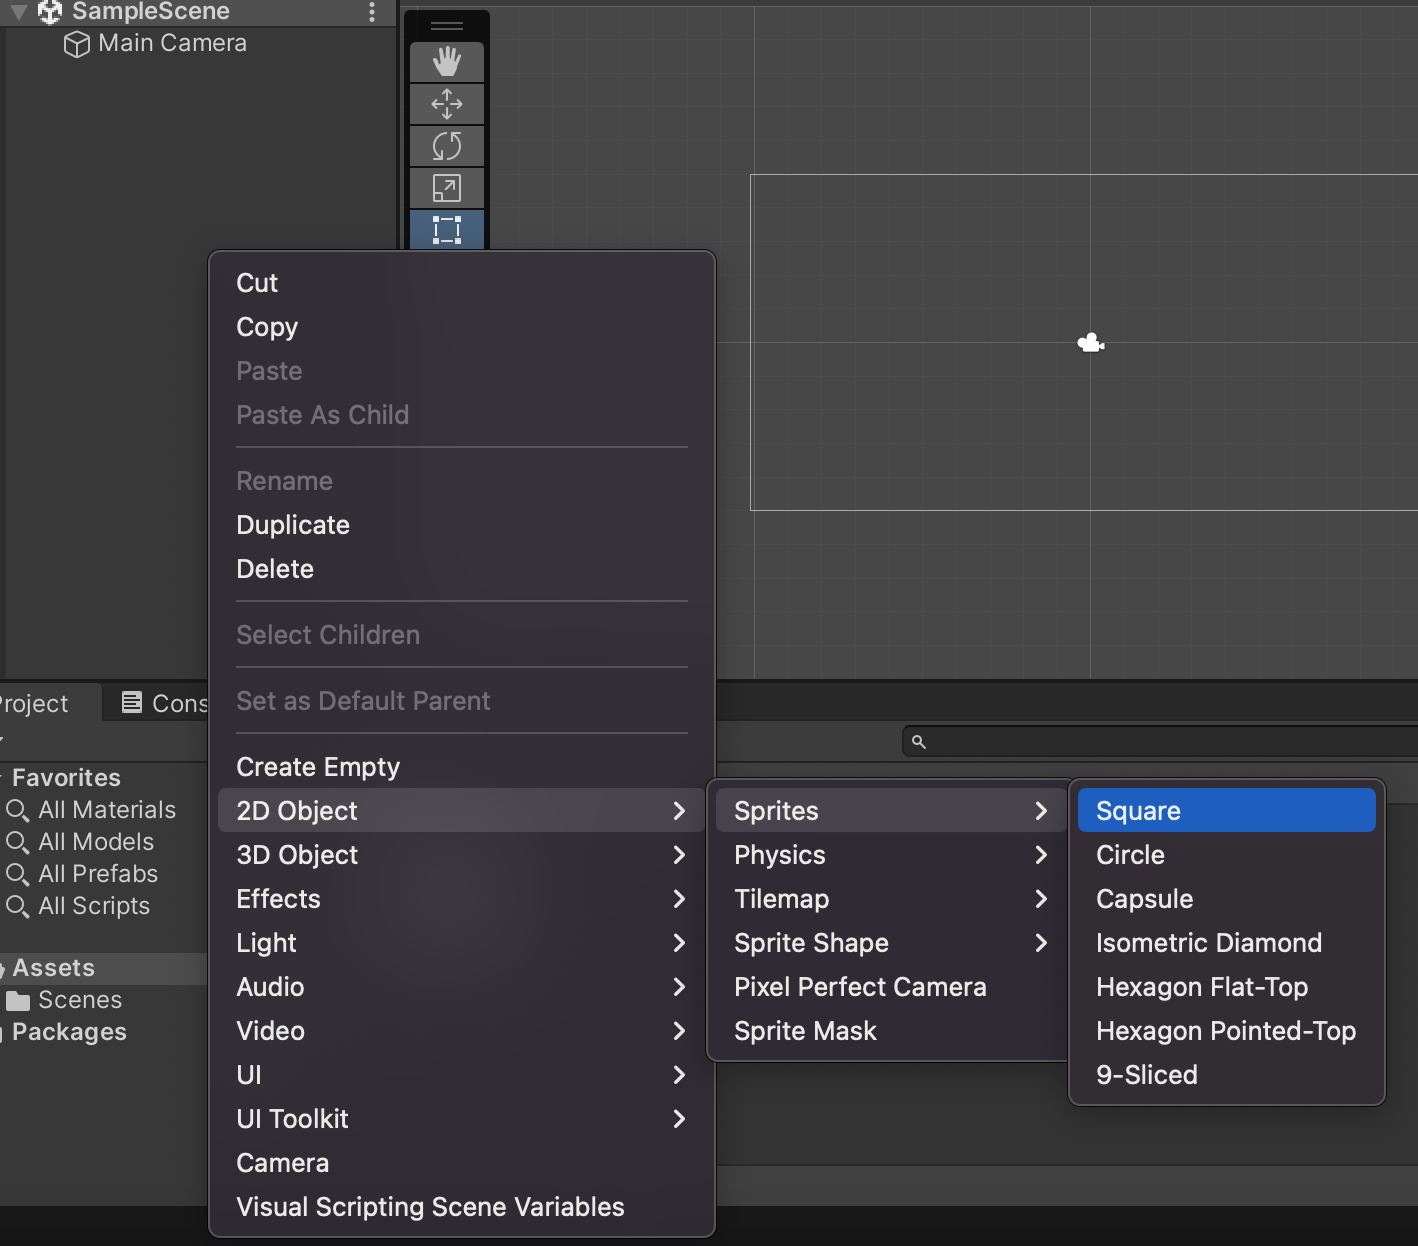
建立玩家物件
在 Hierarchy 按右鍵 2D object > Sprites > Square
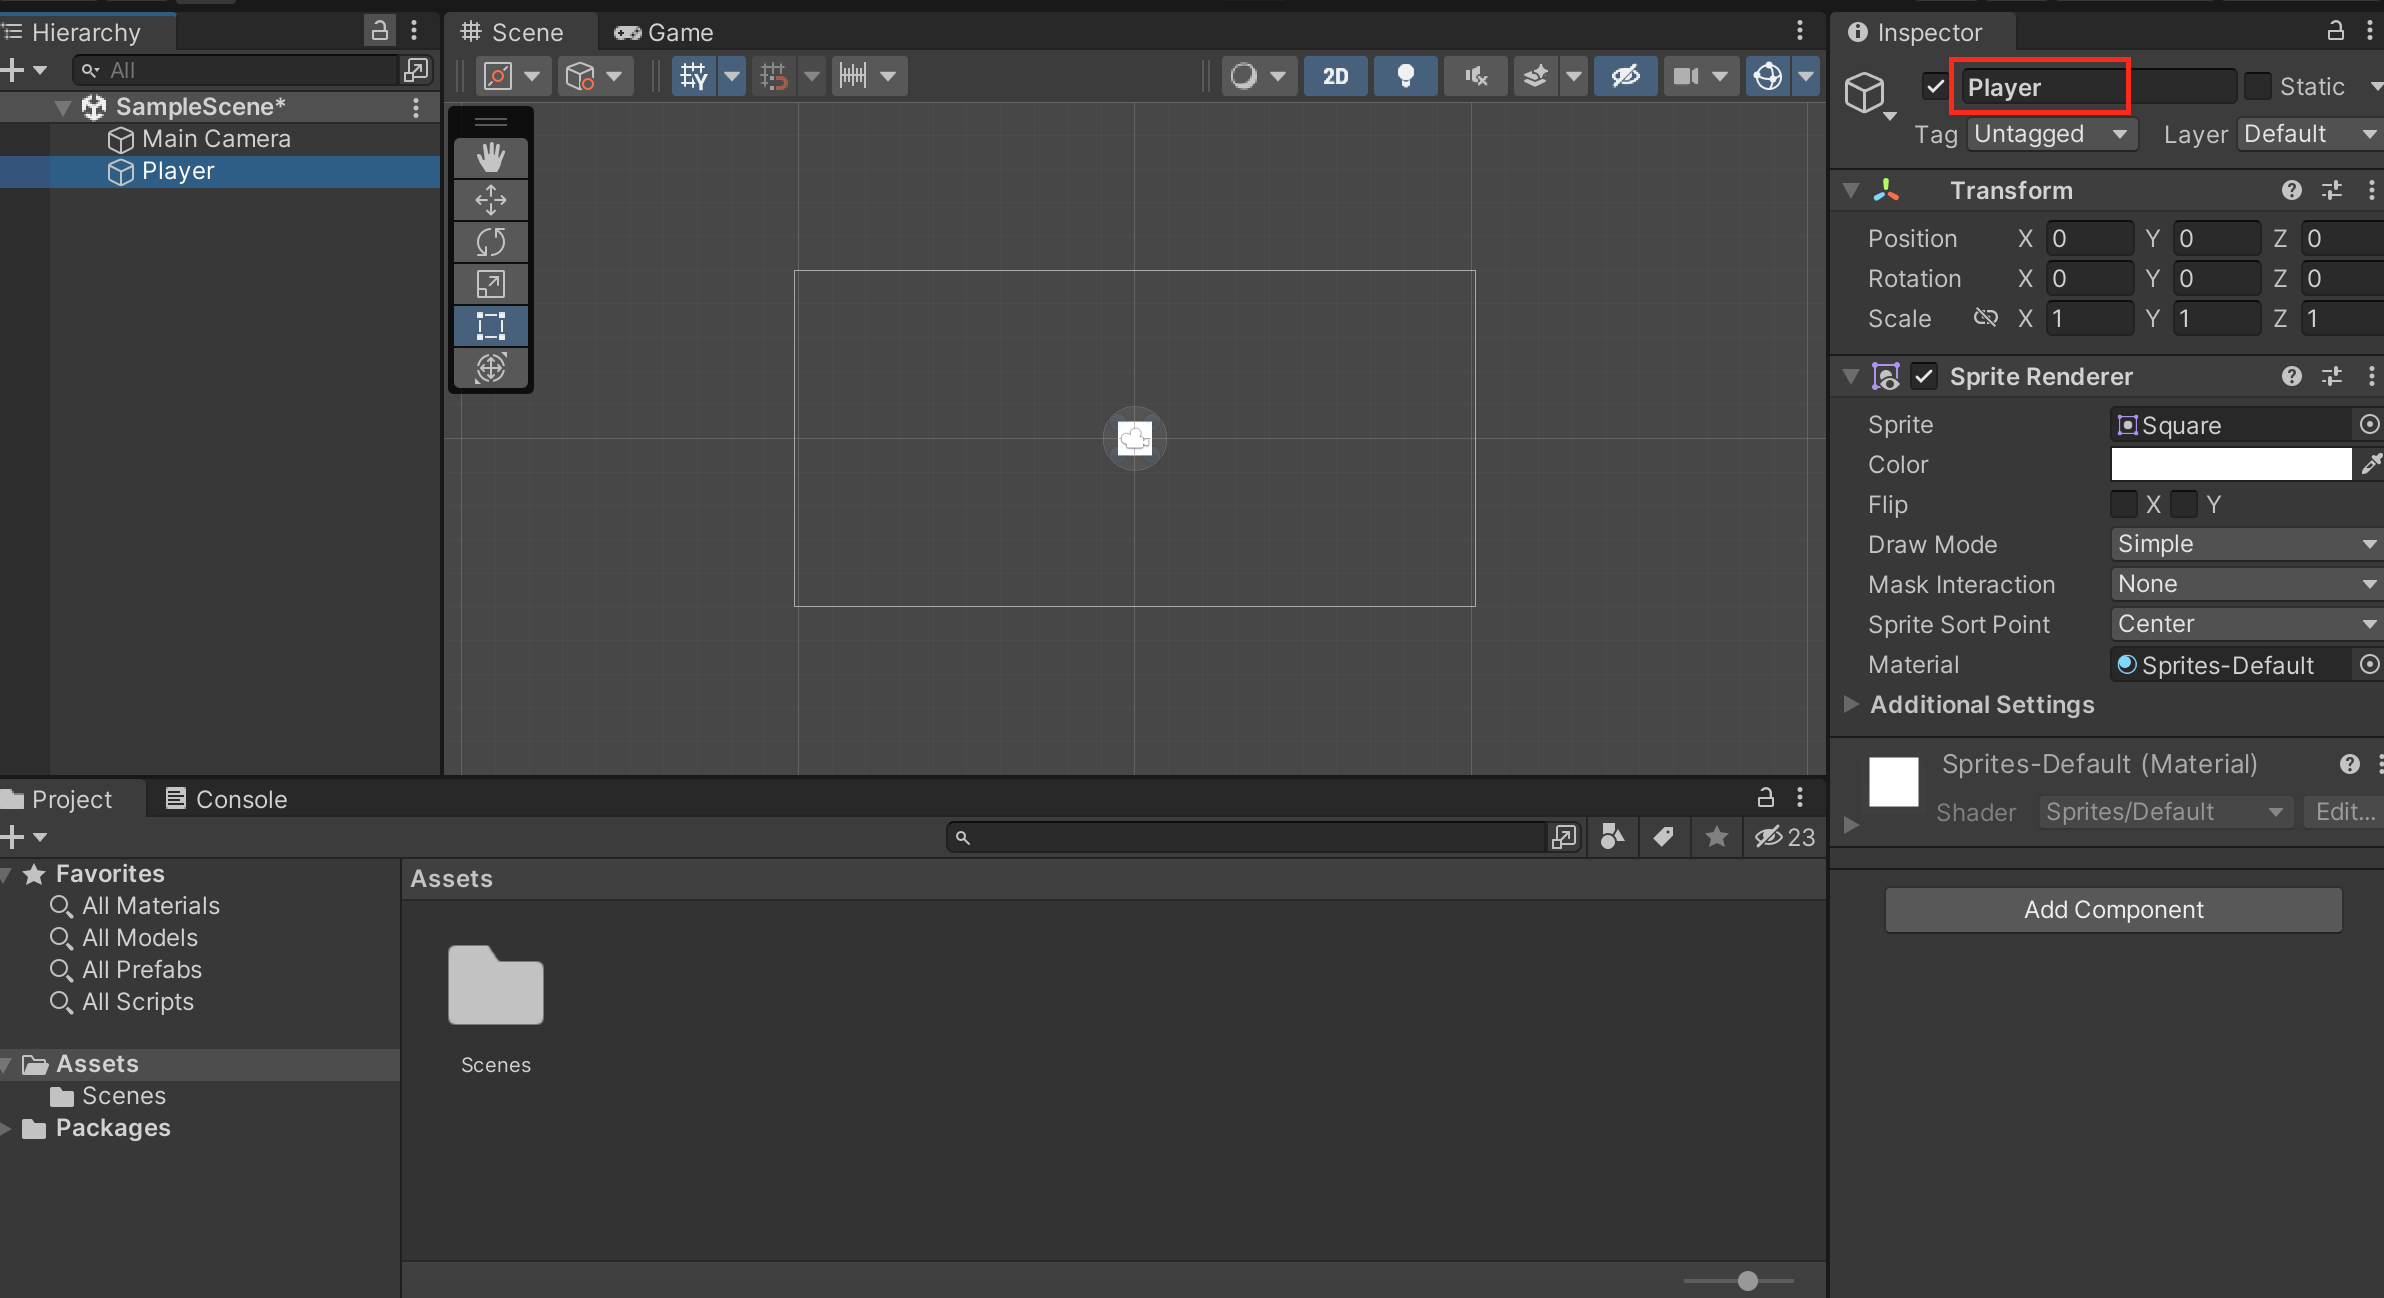
將物件名稱取名為 Player
建立血條
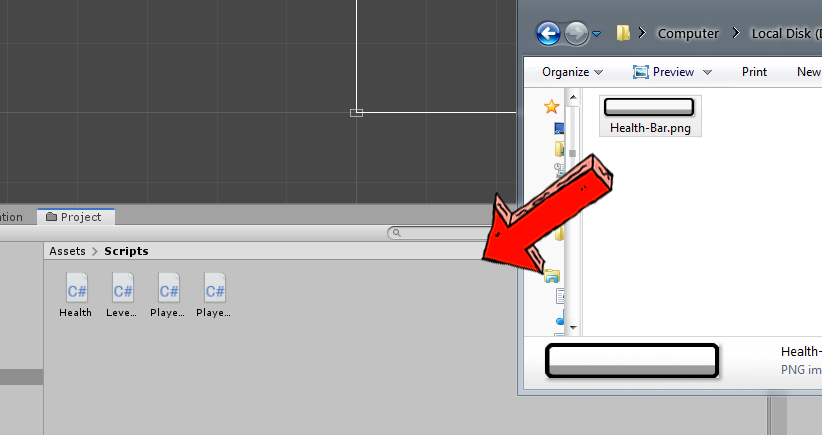
下載血條圖檔
將血條圖檔匯入到 Assets 資料夾裡面,或者放到你覺得合適的位置即可
建立 Slider
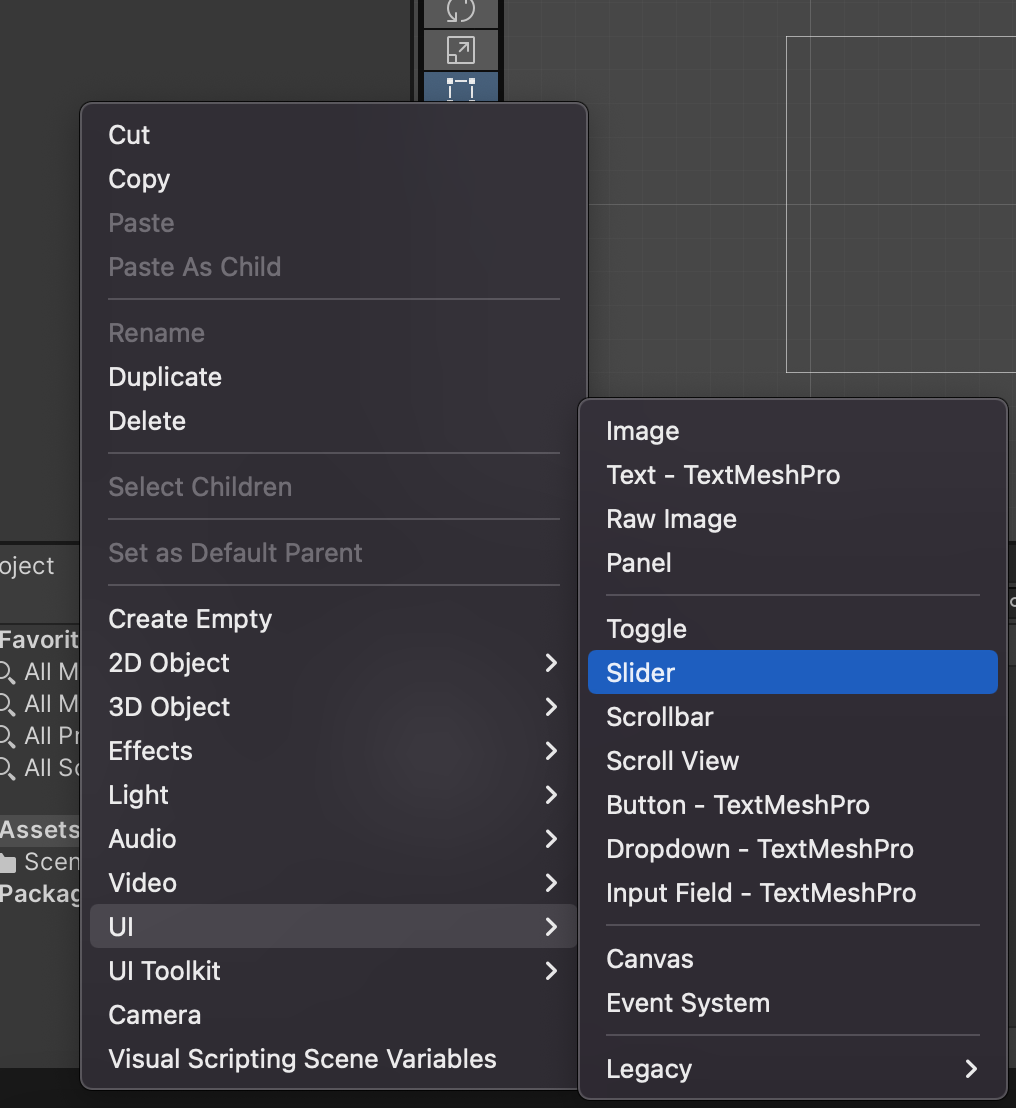
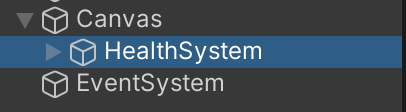
將 Slider 命名為 HealthSystem,你還會看自動新增 Canvas 和 EventSystem 物件
將 HealthSystem 裡面的物件刪掉
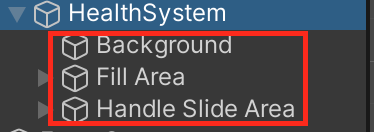
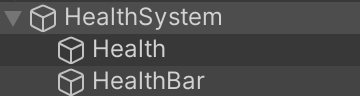
在 HealthSystem 裡面新增兩個 Image
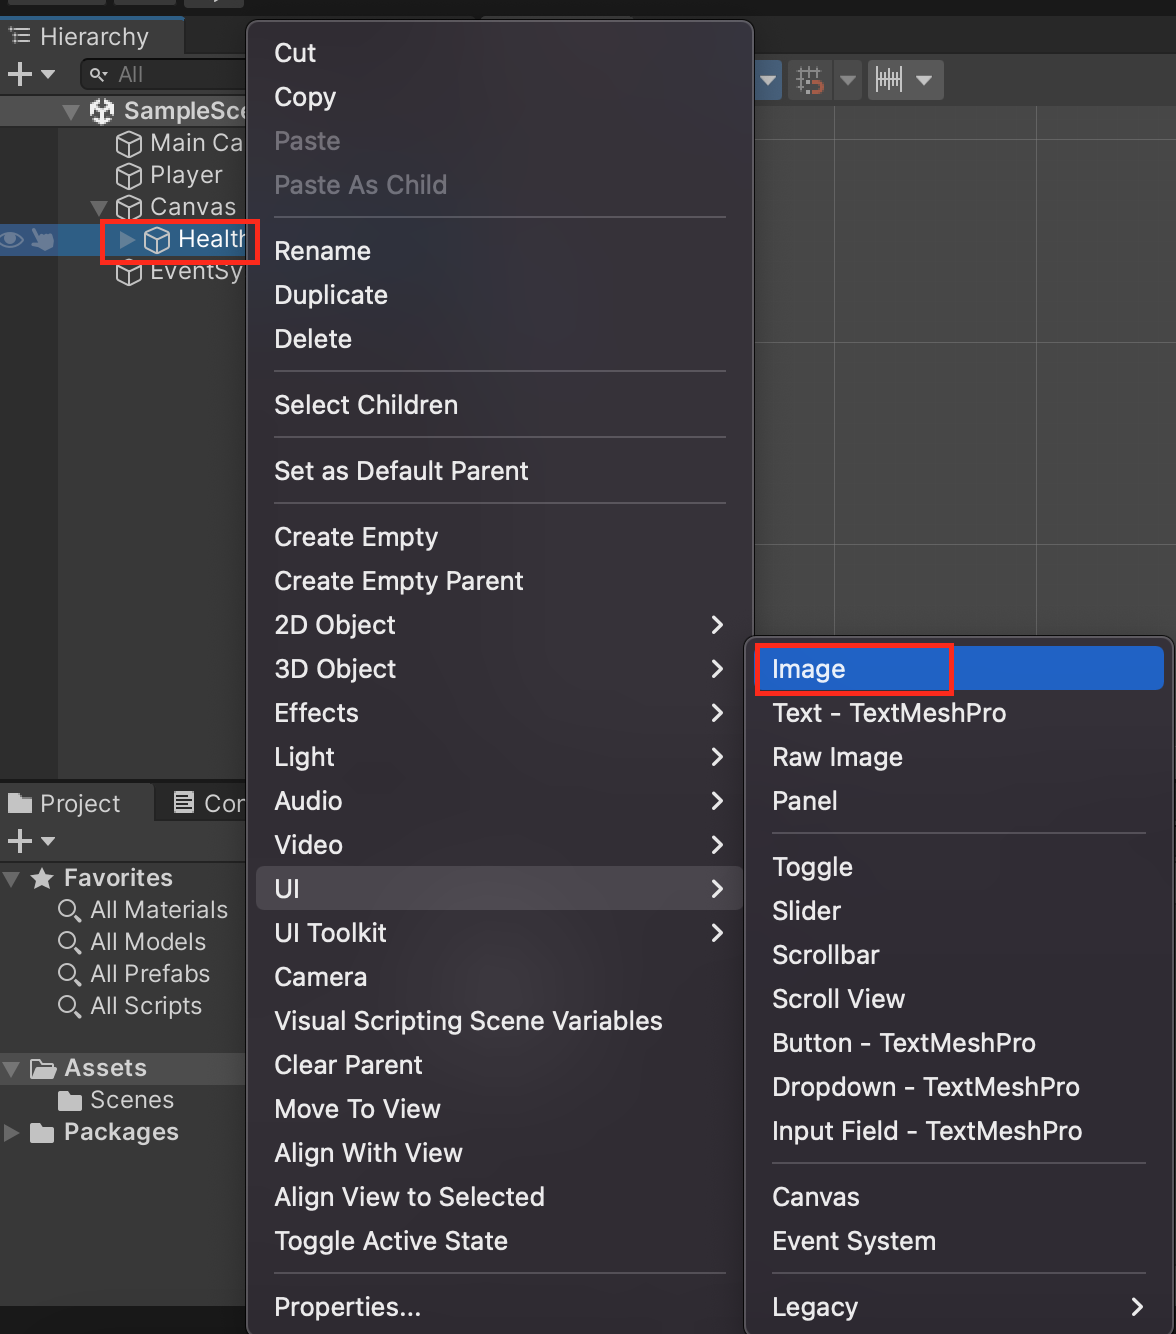
將其命名為 Health 和 HealthBar
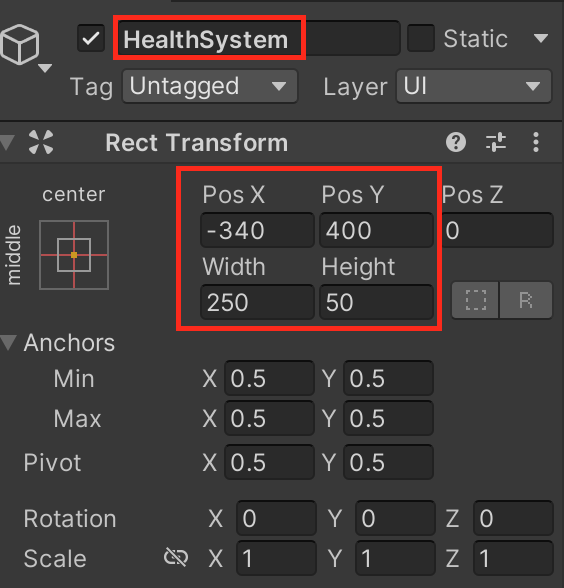
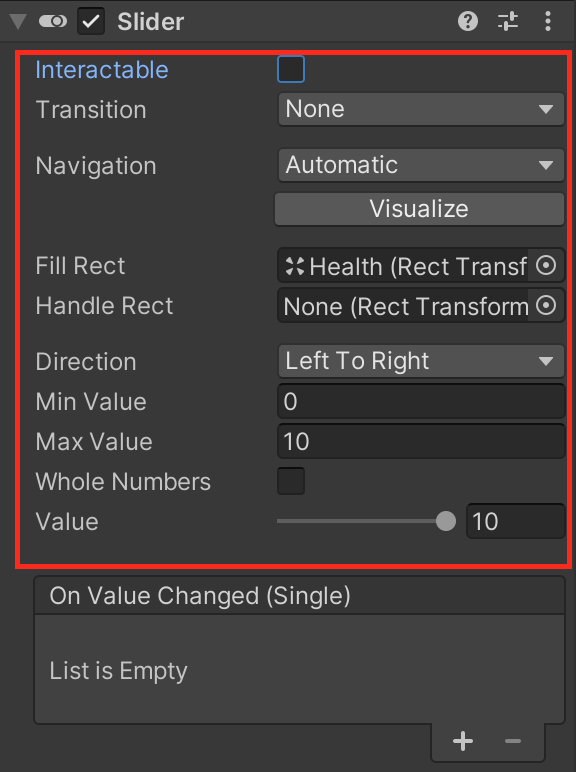
調整 HealthSystem 屬性
Fill Rect 選擇剛剛建立的 Health 物件
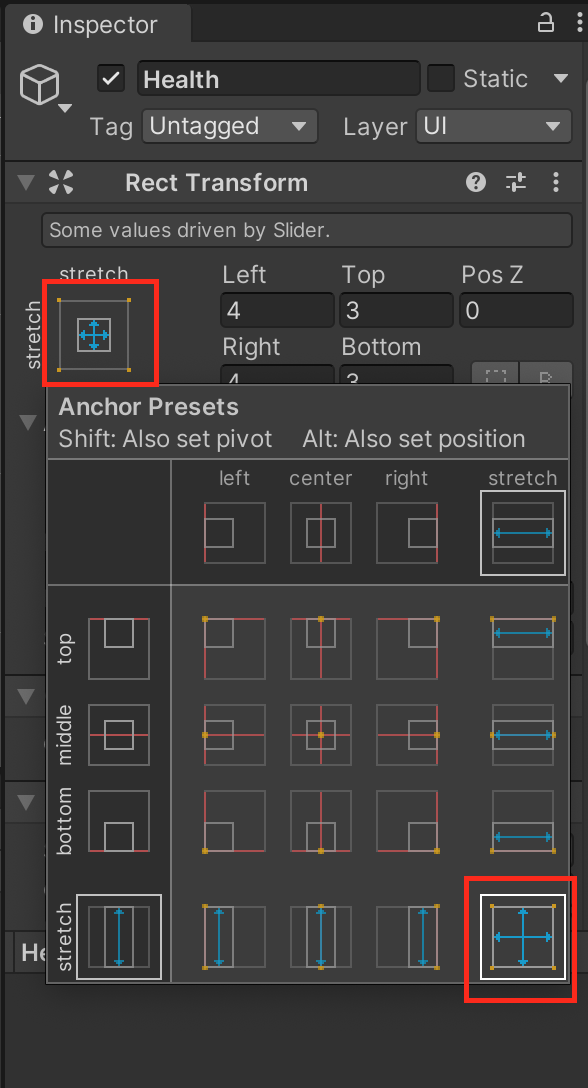
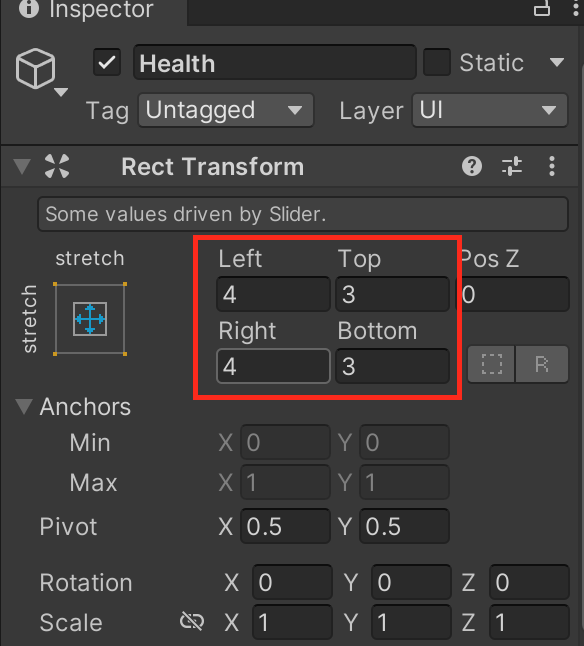
調整 Health 屬性
按住 alt 鍵選擇右下角的 stretch
血條顏色選擇自己喜歡的即可

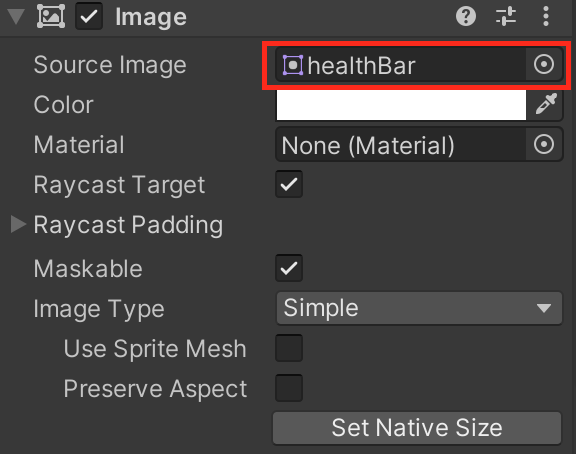
調整 HealthBar 屬性
同 Health 物件一樣,按住 alt 鍵選擇右下角的 stretch
Source Image 選擇下載的血條圖片
程式的部分
簡易的血條系統
新增 HealthSystem.cs 檔,複製下面的程式碼
HealthSystem.cs
using System.Collections;
using System.Collections.Generic;
using UnityEngine;
using UnityEngine.UI;

public class HealthSystem : MonoBehaviour
{
    [SerializeField]
    // 控制生命值
    private Slider _healthSlider;

    /// <summary>
    /// 生命值
    /// </summary>
    public float Health
    {
        get
        {
            return _healthSlider.value;
        }

        set
        {
            _healthSlider.value = value;
        }
    }

    private void Start()
    {
    }

    /// <summary>
    /// 傷害
    /// </summary>
    /// <param name="value">傷害值</param>
    public void Damage(float value)
    {
        _healthSlider.value -= value;
    }

    /// <summary>
    /// 治療
    /// </summary>
    /// <param name="value">治療值</param>
    public void Heal(float value)
    {
        _healthSlider.value += value;
    }

    /// <summary>
    /// 完全恢復
    /// </summary>
    public void RecoverFully()
    {
        _healthSlider.value = _healthSlider.maxValue;
    }
}
將腳本加到 Player 物件
將 HealthSystem 物件拖曳到 Health Slider 欄位裡,讓它取得 Slider

玩家腳本
此腳本放在玩家身上,示範使用血條系統,之後可以再進一步調整成符合自己專案的需求
新增 Player.cs 檔,複製下面的程式碼
Player.cs
using System;
using System.Collections;
using System.Collections.Generic;
using UnityEngine;

public class Player : MonoBehaviour
{
    /// <summary>
    /// 玩家生命
    /// </summary>
    private HealthSystem _healthSystem;

    void Awake()
    {
        _healthSystem = GetComponent<HealthSystem>();
    }

    // Update is called once per frame
    void Update()
    {
        if (Input.GetKeyDown(KeyCode.Space))
        {
            _healthSystem.Damage(1);
        }
    }
}
將腳本加到 Player 物件,因為 HealthSystem 腳本已經加入 Player 物件中,所以
直接在 Player.cs 用 GetComponent<HealthSystem>() 就能取得 Player 物件的 HealthSystem
結論
對於第一次開發血條系統,這是一個很棒的體驗,我比較有印象的血條模式有兩種
第一種就是此範例這種在 UI 上固定的地方,另一種是跟者角色移動
關於跟著角色移動的血條系統,我下一次再跟大家分享
參考
一杯咖啡的力量,勝過千言萬語的感謝。
支持我一杯咖啡,讓我繼續創作優質內容,與您分享更多知識與樂趣!